Farmhouse Mickey Wreath - DIY
- meredithjoy
- Oct 2, 2020
- 4 min read

Updated: Nov 1, 2020

Fall has really put me into the season for crafting. Well, its always crafting season for me but there something especially satisfying about crafting on a cold rainy day. I have been having fun making fall décor that features Disney magic. This project is my favorite make of the season so far. It's modern and elegant with that touch of Disney that makes it extra special. I love the buffalo check bow, it's so cute and it goes with so many fall decorating styles which makes this wreath so versatile. I went with white pumpkins but you could easily go with any color like pink or orange.
Tools
Toothpicks
Hot glue gun + glue sticks
Needle nose jewelry pliers
Wire Cutters
Scissors
Materials
Lambs Ear Garland - Hobby Lobby
Floral Wire - Hobby Lobby
Titanium White Acrylic Paint/paint & color of your choice
Floral Foam- Dollar Tree (or any craft store)
Medium & Mini Pumpkins - Joann's
12 inch Grapevine Wreath- Joann's
Buffalo Check Ribbon- Joann's
If making a wreath from scratch sounds daunting hobby lobby has premade lambs ear wreaths that you can buy. I saved money by making mine but it took a lot more time.

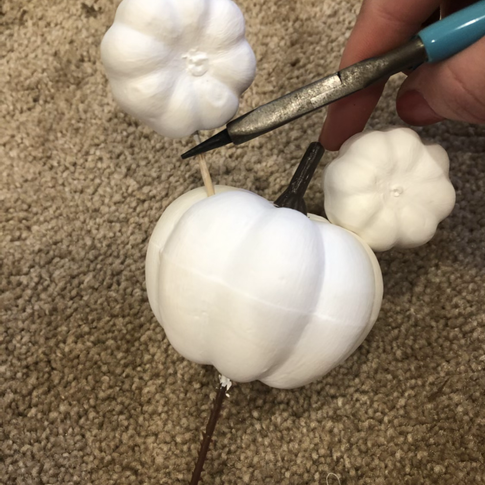
Remove all stems from pumpkins, set aside. Remove wires from the small pumpkins. Leave the wire picks on the medium pumpkins. (There are 3 medium pumpkins pictured but I decided to only use one for this project.)
Poke toothpicks though the bottoms of the small pumpkins. I find this makes them easier to paint and dry between coats of paint. I ended up painting 6 coats of white paint on my pumpkins. If you have foam disks, poke the toothpicks into the so the pumpkins dry. When the pumpkins are done being painted, poke the stems back into the medium pumpkin and four of the small pumpkins.
I worked on assembling the bow and wreath in between letting coats dry on my pumpkins.


Cut the lambs ear garland into approx. 6 in sections. I cut after every 3 bunches of leaves. Center the leave section toward the inside center of the wreath. Tuck the ends into the vines.

Take floral wire and cut it in half. Use the half strips of floral wire to secure the lambs ear to the wreath. Poke the floral wire over each side of the stem through to the back side of the wreath, on the back side of the wreath pull the wire tight, cross and then twist the two ends together. I secured each lambs ear piece with 3 wires one at the beginning, middle and end.

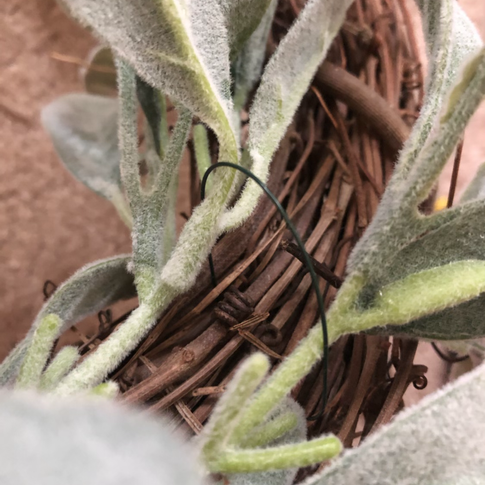


When placing the second lambs ear section place it next to the first piece, off set the second lambs ear piece by one leaf section. Secure with floral wire. You can use hot glue instead if you don't want to use floral wire.

Take a third lambs ear section line it up after the first section towards the inside center of the wreath. Secure with floral wire. Take the forth section and line up after the second section towards the outside of the wreath next to the fourth section. Secure with floral wire.


Hopefully this illustration helps to make the process of how I layered the leaf pieces clearer.

This is what your wreath should look like as you get to the end. Use your last lambs ear section to fill in the gap. This will be the top of your wreath and the place you will attach your bow.

Cut a square of foam. Poke both ends of the floral wire though the middle of the foam square, use the wire to attach the foam square to the top of the wreath.


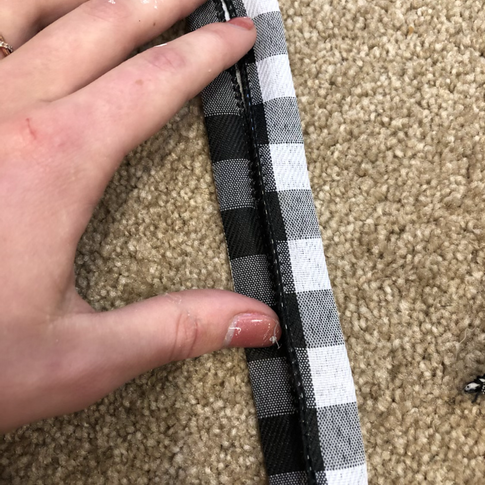
Time to make your bow. Cut your buffalo check ribbon into four 14 inch strips, one 10.5 inch strip and one 5 inch strip.
On the 10.5 inch strip cut a V into each end. Take the four 14 inch strips, hot glue both ends together at the back. Gather the ribbon with a few folds to create the bow, secure with hot glue.


Stack two bows on top of each other and hot glue together. Repeat to make a second stacked bow. Take the two stacked bows and hot glue together at the center.


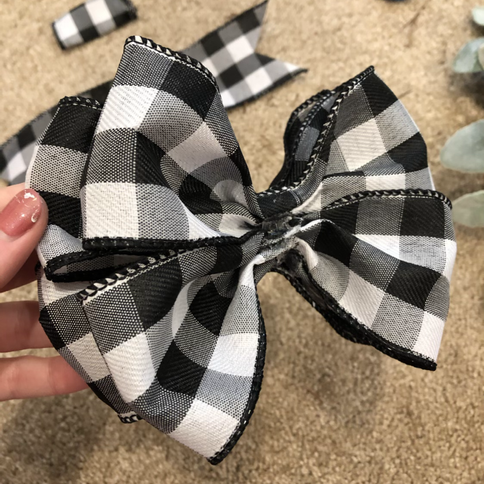
Pinch the ribbon with the cut ends together, hot glue to the bottom of the ribbon at the center. Fold both ends of the 5 inch ribbons in to the center. Hot glue this strip over the center of the bow securing at the back. Hot glue your finished bow on to the foam square.


Pumpkin Mickey Time!
Take your white painted pumpkins stick a tooth pick into the side of two of the small ones. Using pliers, if you have them, slide the tooth pick into the top of the medium pumpkin, secure with a dot of hot glue. Remove the wire pick from the medium pumpkin and poke it into the back of the medium pumpkin, securing it in place with a dot of hot glue.


For the other small white pumpkins. Cut 2 pieces of floral wire in half poke through the bottom of the small pumpkins and secure with a dot of hot glue. Use the wire to poke the pumpkins though the wreath and wrap around vines on the back to secure. It helps to have pliers to help poke the wire though the vines. Center the Mickey Pumpkin on the bottom and have two small pumpkins on either side.


To finish the wreath I braided 3 strands of Hemp Twine (I think, it doesn't matter what type of twine you use. I just used what I had on hand.) I poked a floral wire though the center of the braid and then wrapped it around a few vines on the back. This created a way for me to hang and display my wreath easily.


I really loved working this project and I'm so happy with the final result. I hope you enjoyed this tutorial. Feel free to substitute hot glue for floral wire if you feel more comfortable assembling the wreath that way.

If you make your own version I would love to see, Tag me on Instagram @meredithmakingmagic
If you want to save this tutorial to make later I'm on Pinterest as Meredith Making Magic, you can find this pin and other magical inspiration on my boards.
Happy Crafting,
Meredith Joy


Comments