Mickey Picnic Blanket DIY & Fall Disney Style
- meredithjoy
- Oct 13, 2020
- 5 min read

Updated: Nov 10, 2020
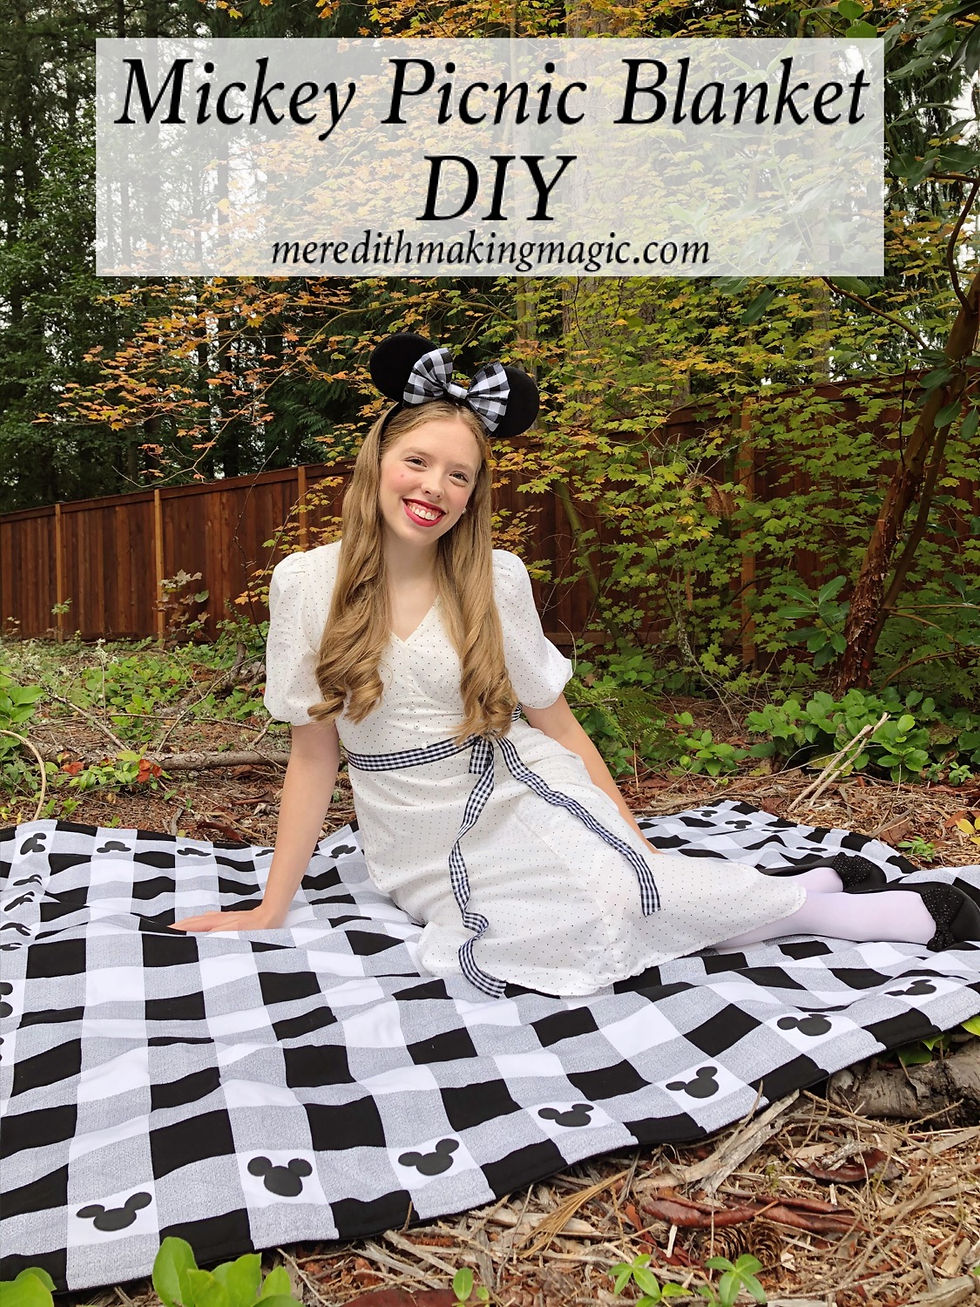
Waterproof Mickey Picnic Blanket is perfect for Disney Picnics all year. When I set out to make this picnic blanket I knew it had to be waterproof and include Mickey Mouse in some way. The result was pretty cute and functional! Oh, it's also machine washable which was important to me.

This summer I dreamed of putting magical picnics together. I had plans for making a Disney picnic set and putting together picnic outfits, but before I knew it summer was over. I couldn't get my picnic projects out of my head so I decided to make a picnic blanket so I would have it ready for picnics next year.
I spontaneously decided to take these fall picnic pictures when I realized my outfit matched my picnic blanket! I put together this outfit to match my Farmhouse Mickey Wreath (tutorial here).

With a few black buffalo plaid ribbons I was able to create a fall Disney style look. I used leftover 2 1/2 inch ribbon from my wreath to make a plaid bow for a cheap pair of plain mickey ears I had. For my sash I used 1 inch ribbon. I love using ribbons in my hair or as sashes so I save them from gift wrapping or buy them to match.


Materials
3 yards of canvas buffalo check plaid*
2 yards of fleece*
2 yards of water oxford nylon fabric*
Thread in Back & White
Black Acrylic Paint
Textile Medium*
Round Sponge Brush 1 1/4 inch
Round Sponge Brush 1/4 inch
PRE WASH FABRIC BEFORE USING: Oxford Nylon wash on warm regular laundry soaps, dry on low heat. Fleece/cotton wash on hot with regular laundry soaps.
Don't wash with other laundry in case the fabric dyes bleed. After the pre wash, the fabric/ completed blanket can be washed with other laundry.
*I bought all my fabric from Hobby Lobby
*pre wash all your fabrics before using.
*Textile Medium appears to be more expensive online check your craft store before ordering. Here is the one I used but I bought it several years ago.
You will need a sewing machine if you plan to sew your own blanket. If you don't want to sew your own blanket you can buy a buffalo check picnic blanket and give it a Mickey makeover.
You can make this blanket any size. Mine ended up much smaller than I planned but it's the perfect size for a picnic for two.
I bought 3 yards of buffalo plaid, mine was canvas cotton which is heavier weight that regular cotton. The fabric was 45 inches wide, which is smaller than I wanted the width of my blanket to be so I cut my 3 yard piece down the center lengthwise, so I had two pieces of fabric.
I pinned the two pieces together on the width edge. Make sure to continue the pattern when you match up the edges and pin together.

Using your sewing machine, stitch along the pattern edge to attach the two pieces of fabric.

This is what the back of my fabric looked after it was stitched together.

Press the seam open. The pattern should be a seamless continuation on the top. Trim off any excess at the edges so the fabric will be a rectangle. I chose to have the black pattern strip be the edge of my blanket so I trimmed off the white strips from the outside edges.

I lost several inches off of the length and width to even up the pattern. Disregard the safety pins in this picture, I debated quilting the top of my quilt but I decided against it.

Find a large hard surface. Lay the canvas fabric on the surface with the wrong side (backside) up. Take the fleece fabric and lay it on top smooth from the center out toward the edges. Place a pin at each of the edges. Smooth out the fabric again make sure there is no excess fabric in the middle or wrinkles. Working all the way around the edges of the blanket pin together the two layers of fabric every few inches.
Take this to your sewing machine. Line the edge of your fabric up with the edge of your presser foot. Stitch the fleece and the cotton together around all sides. Trim off the excess fleece from the edges.
Now lay the water resistant fabric on the bottom. Lay the cotton/fleece piece on top the cotton side should be face down and the fleece fabric should be on the top. Smooth out any wrinkles. Pin the cotton/fleece piece together. After all the sides are pinned together trim off the excess water resistant fabric from the edges.

Stitch together using a 1 inch seam allowance. On one side leave an opening approx. 12 inches wide. Make sure to backstitch on either side of the opening.

Trim some bulk out of each of the corners, like how I did in the picture. Using the small opening pull the blanket though to turn right-side out.

Make sure the edges are lined of evenly on either side of the blanket and pin together.


Line up the blanket with the side of your presser foot and top stitch around all sides of the blanket. The blanket construction is now complete.

Time for this blanket to get a Mickey makeover!
You should have some scraps leftover, I used mine to practice my fabric painting technique before doing it on my blanket. Originally I planned to do this mickey pattern over the whole blanket. But I was tired and not paying attention while I was painting on my blanket and painted in the wrong squares on the edges messing up my pattern. My husband came up with the idea to do a Mickey border instead to save the mistake and make it look intentional. It really turned out quite cute, beautiful things can come out of mistakes.

To make the Mickey's I used two different sizes of sponge brushes. You can use black fabric paint but I have a large collection of acrylic paints I bought textile medium. You mix 2 parts acrylic paint to 1 part acrylic paint. This makes the acrylic paint act as a fabric paint. If you use textile medium follow the directions on your bottle.
I used a frixion erasable pen to mark 1/2 inch up from the bottom of the square I was painting the Mickey's on. The pen line will disappear when ironed over. I used the line to help paint the Mickey's at a consistent height.


I painted the big circles first and then when back to paint all the Mickey ears. Let the paint set for 72 hours. Then heat set it by going over it with you iron for 10-15 seconds. I put a scrap cloth between the iron and the paint just to make sure there would be no transfer.
The blanket is now ready to be used and washed. This blanket can be machine washed on warm and dried on low heat or hung to dry. The care instructions for your blanket can vary based on the fabrics you decide to buy.


I'm really excited to have a Waterproof Buffalo Plaid Picnic Blanket! Hopefully I can go on a few fall picnics before it gets too rainy. I hope you liked this tutorial. If you make this please tag me @meredithmakingmagic
Happy Crafting,
Meredith Joy


Comments